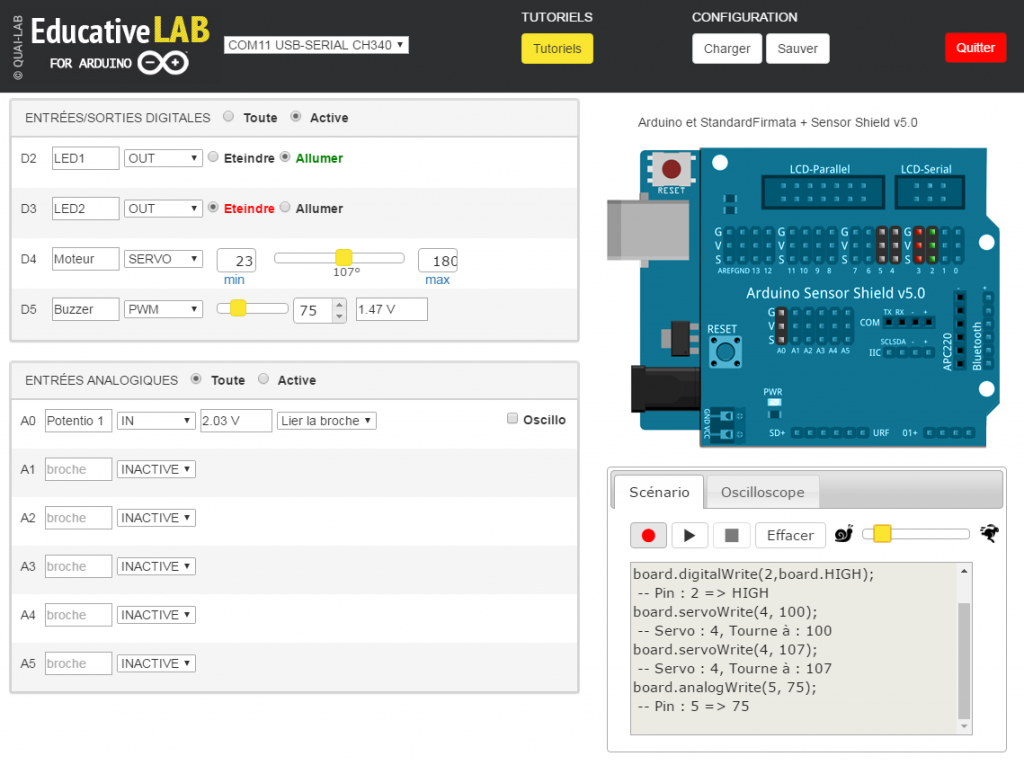
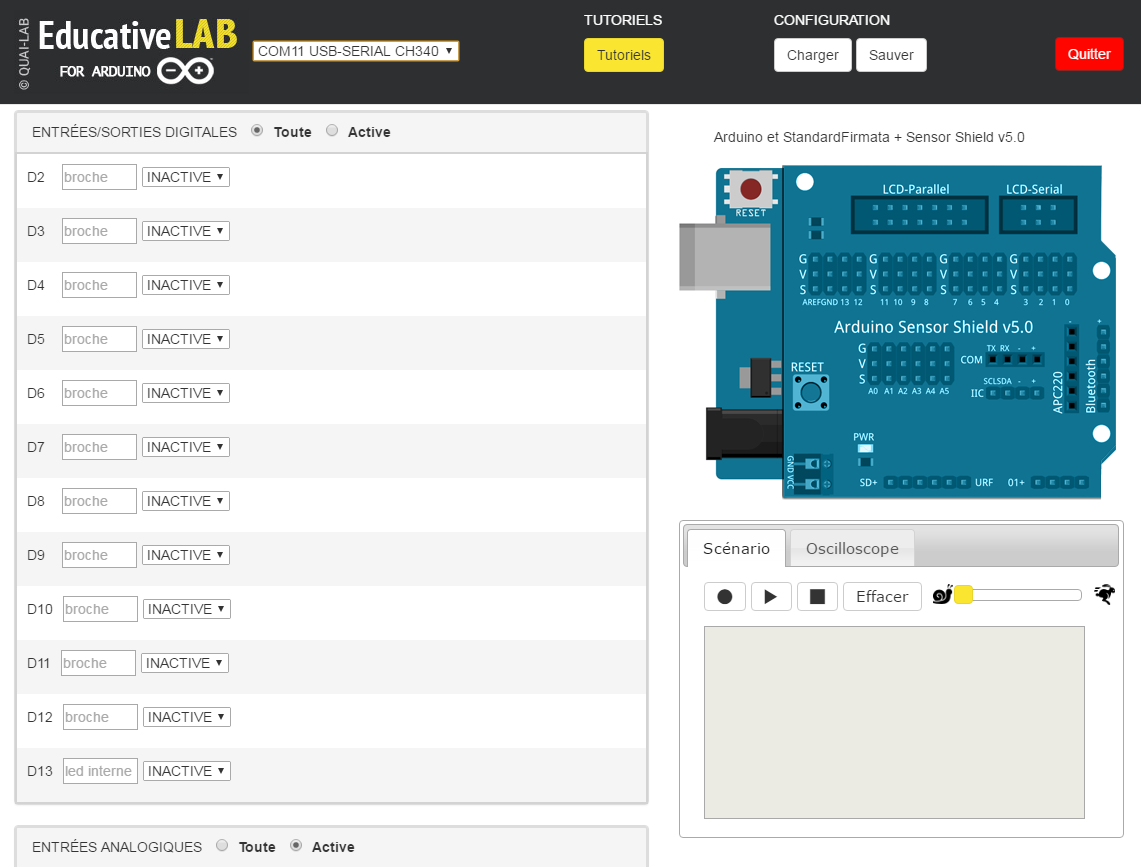
We have designed Educative Lab for educational purposes in order to provide a quick and easy insight of the Arduino. Educative LAB can graphically control each input or output pins of the Arduino.
A RECORDER feature will enable the recording and the replay of the actions done with the interface.
An OSCILLOSCOPE feature allows to observe voltage changes on one of the analog input.
Also, using a software to « link » an output to an input and a potentiometer, will give control over the intensity of a LED, the angle of a servo motor etc.
This application can be used by children from 7 years.
Installation :
Educative LAB is a Chrome App, meaning it is an application running with the Chrome browser without being installed on your computer. Educative Lab can run on PC, MAC, Linux and small devices such as RaspBerry PI 3. The only requirement is to install Google Chrome or Chromium.
Click the link below to install Educational Lab in your Chrome browser.
https://chrome.google.com/webstore/detail/educativelab/gkfbbohigjeocmlliifdacfdjhanphmi
Recommendation :
The Arduino and breadboard connectivity is not easy for children, which is why we took the liberty to add a Sensor shield ( cheap expansion card plugged into the Arduino) allowing the connection of inputs/outputs with 3-pins Dupont LEDs (these connectors can be found in old computers and are already wired to LEDs, pushbuttons and buzzers) which already offers a lot of possibilities for experimentations.
The shield is not essential, Educative Lab can be run using only the Arduino.
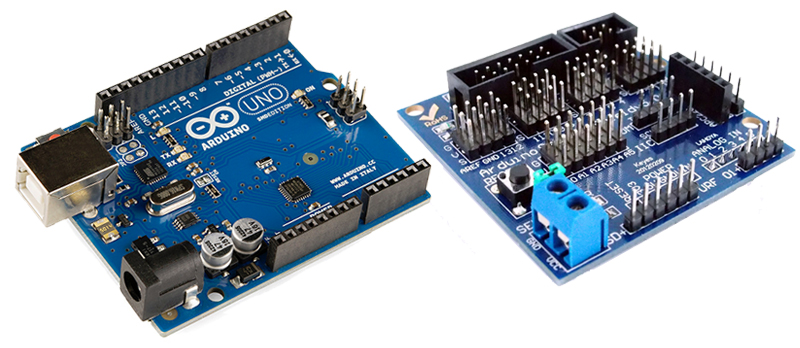 Arduino + Sensor Shield V5
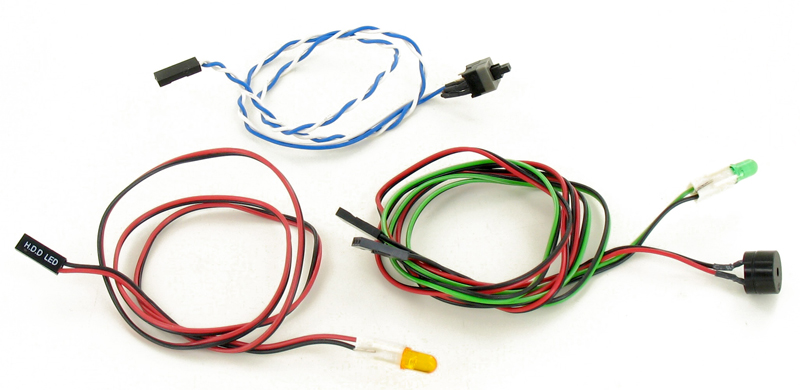
Dupont connectors from an old computer
Pre-requisites :
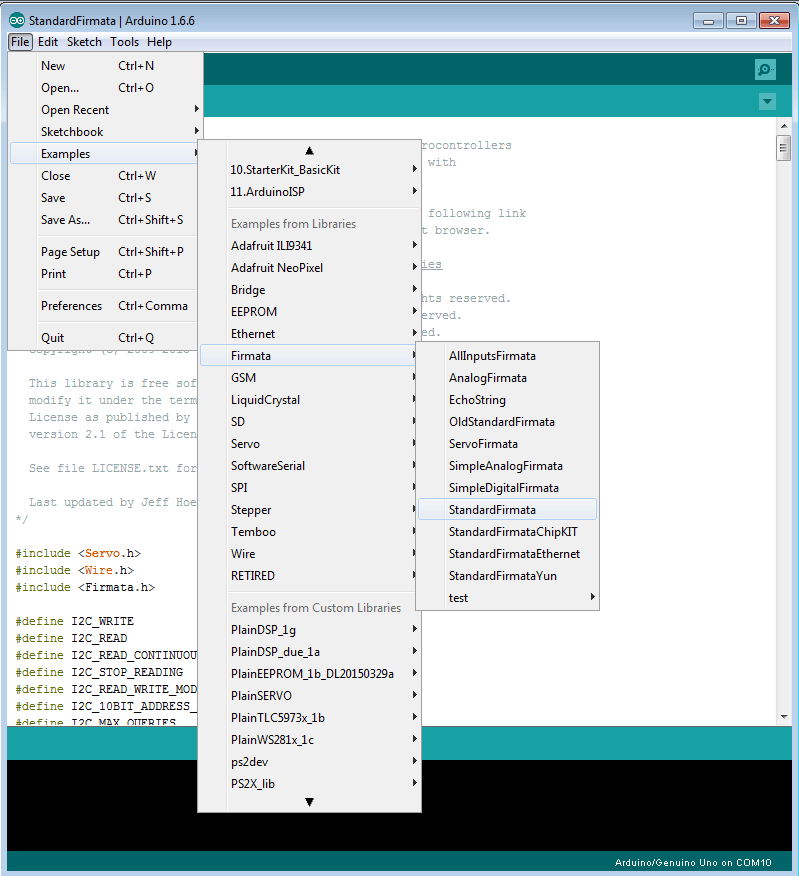
The « Firmata Standard » code must have be implemented into the Arduino . Educative Lab uses this standard to send orders to the arduino via USB.
How to install « Firmata Standard » into my Arduino.
– Click on the link below to install the Arduino IDE: https://www.arduino.cc/en/Main/Software
– Connect your Arduino via USB
– To run the Firmata library, run the IDE, then click on : File > Examples > Firmata > Standard Firmata then click on upload.
From now on, you no longer need to run the IDE, the Arduino can be controled with any computer using a Google Chrome browser.
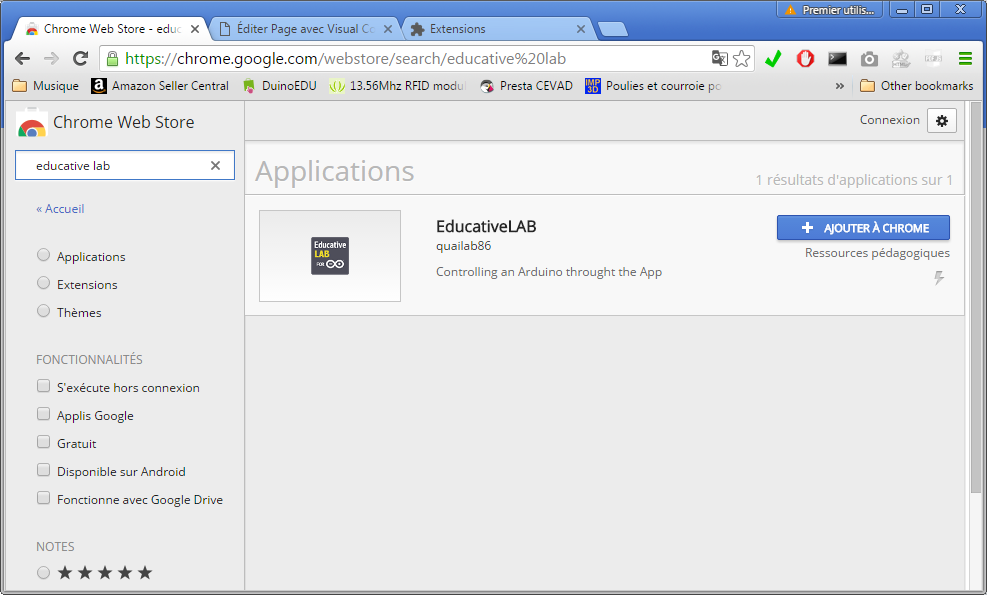
How to install Educative LAB in Chrome
Click on Download Educative LAB or navigate to the chrome store : https://chrome.google.com/webstore and type Educative Lab in the search box then click on the [Add to Chrome] button.
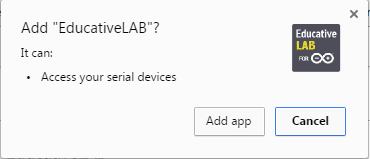
Then click on Add App or the Add Application button in the pop up window that appears to inform you that Educative Lab needs to access the usb port from your computer (it is necessary in order to communicate with Arduino and completely safe).
That’s it! You are now in possession of the Educative Lab application. No internet connection is required to run the application.
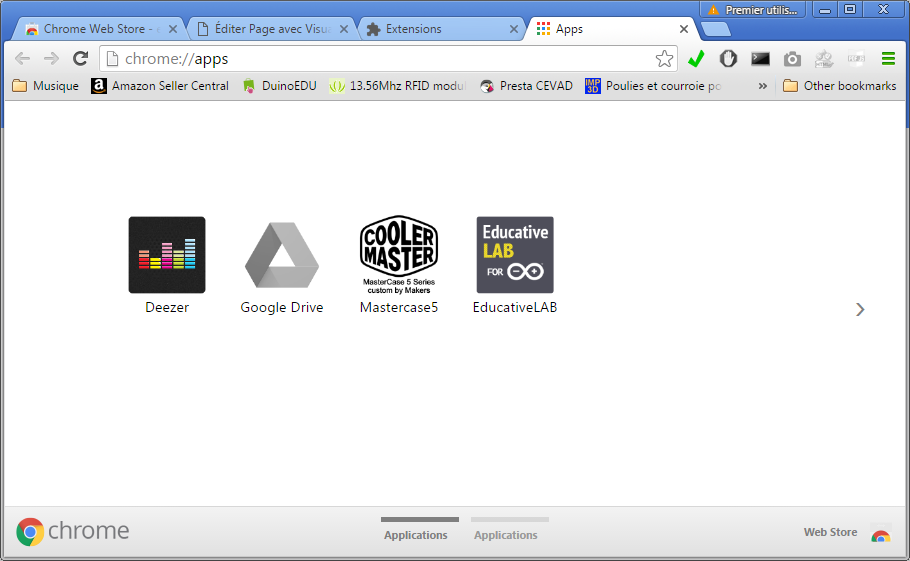
Start Educative LAB
Go to the « Application » tab in Chrome and click on Educative LAB.
If your Arduino is plugged, it should be recognized and displayed. If several USB devices are connected, choose the USB connection from the list.
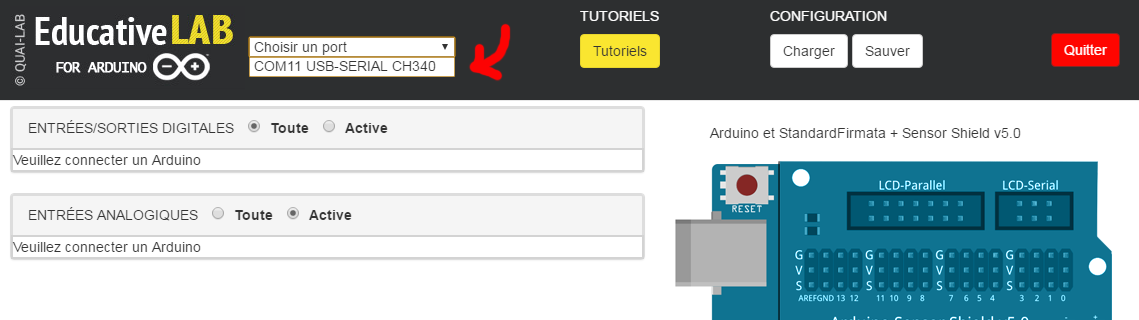
The connection takes a few seconds,then you will see the available connections on your Arduino board (uno ou mega).
You can now start using your Arduino.
First use of Educational Lab : « Blink » test
The pin n°13 is usually connected to the red LED blinking at the start of Arduino.
Choose the « OUT » mode, then click on « switch on ». The LED should light up.
The board displays the position and the state of the pins in use, this can help you to position your Dupont connectors.

Switching on and off a LED now being under control :-), start the recording mode and then switch on the internal D13-LED.
Then click on the stop button (square icon).
You can now replay your recorded sequence. The LED should blink.
The replay speed can be adjusted when activating the slider framed by a snail and a rabbit. The flashing of the led speed can vary from slow to very fast!
Then, with a few more leds, we will see in the tutorials how to create chases with effect « to the k2000 » scroll leds in loops etc…
Feel free to share your ideas for improvement.
Frequently asked questions
Where is the configuration backup located on my disk
On Windows, configuration files have the .xml extension and are saved in C:\Users\Votre identifiant Windows\Downloads
Why have I lost the connection between the Arduino and the computer
If you connect a servo motor to the Arduino for instance, or card consuming more electricity than the Arduino can provide via USB, it will then restart and thus reset the connection with the computer.
We recommend to always make the connections and then after checking for possible issues, to connect the USB cable to the Arduino to your computer.